Admin Setup
When you first sign in as the admin of a new company, Terio takes you through a setup wizard before you reach the main product. One progress bar runs along the top the whole way, and the three headings under it (Company Setup, Your Details, Team and People) show where you are.
Your answers are saved as you go. If you close the browser you pick up where you left off, with your answers still filled in, and the Back button always keeps what you have typed. If something is not working, use "Something not working? Tell us" at the bottom right of any setup screen.
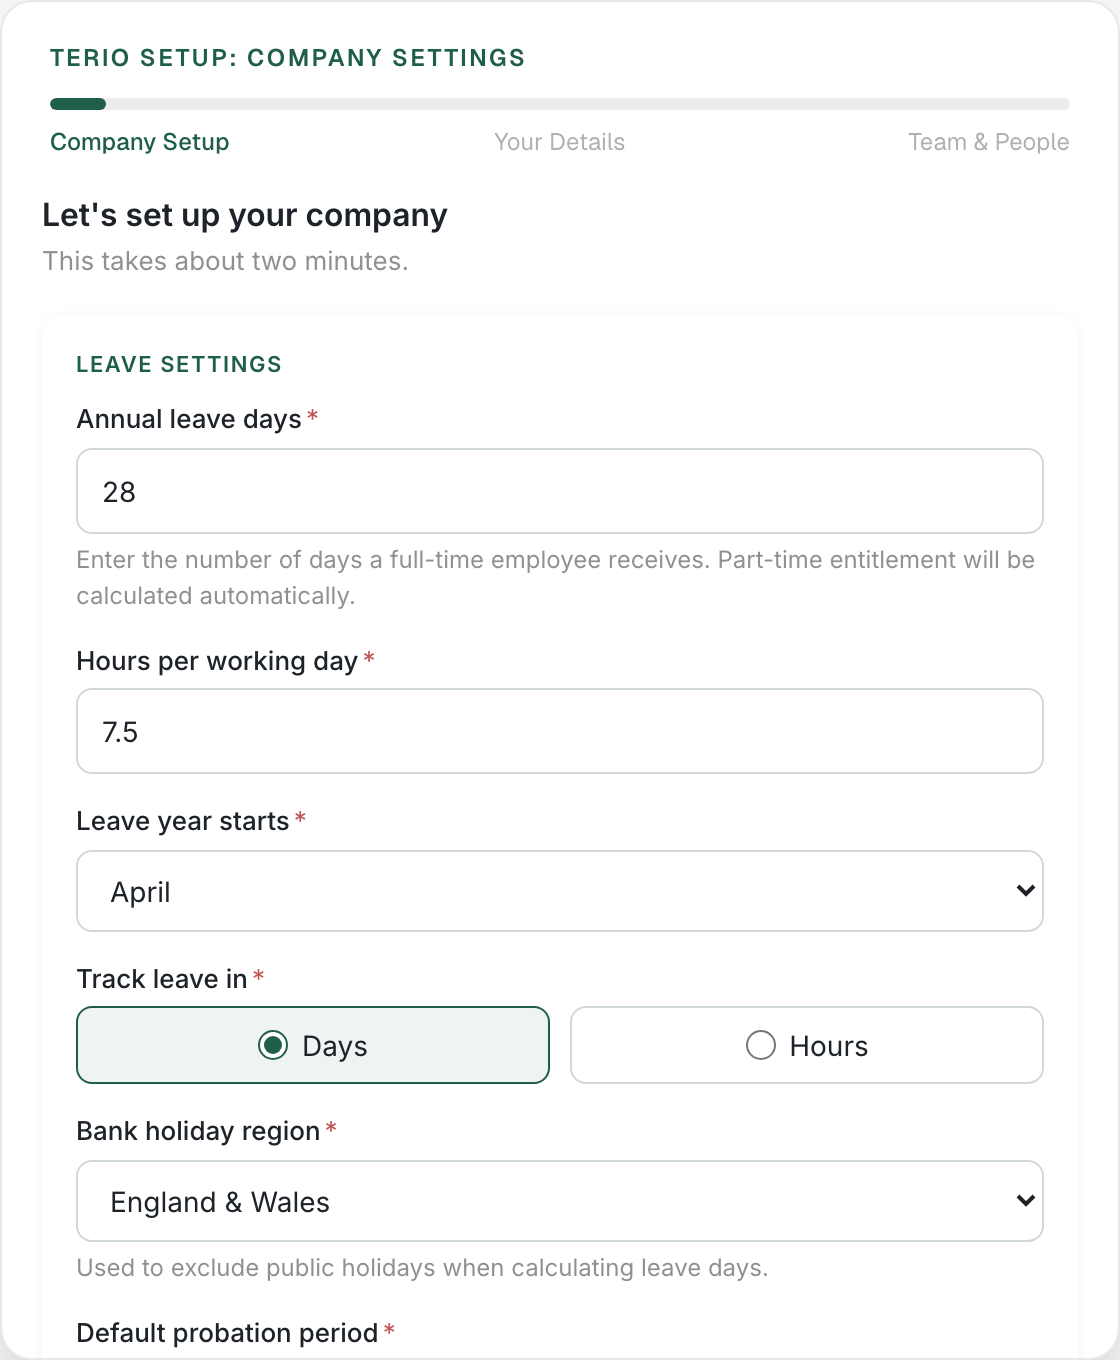
Section 1: Company settings
You set the rules Terio applies across your whole company:
- Annual leave days: the number of days a full-time employee receives each year.
- Hours per working day: used to convert days to hours for every leave booking, approval and balance. Default is 8, and 7.5 works too.
- Leave year start month: the month your holiday year begins.
- Track leave in: choose whether leave is shown in hours or days throughout the product.
- Holiday region: England and Wales, Scotland or Northern Ireland, for bank holidays.
- Default probation period: 1, 2, 3 or 6 months. New employees get a probation end date from this, and you can change it for any one person.
- Managers can view salaries: switch this on if managers should see their direct reports' pay. Off by default.
- Absence review trigger: how many absences within how many months start a management review.
The trigger you set here is the one Terio uses everywhere. Saving this section again replaces it rather than adding a second one. You can add stepped triggers later by asking Terio.
Section 2: Your details
A short form completes your own employee record: job title, start date (pick it from the calendar), working pattern, working location, gender, personal phone number, personal email address, home address and your team. A business phone, a preferred name and your salary are optional. Phone numbers must be UK numbers and email addresses are checked, so a mistake is caught before you move on.
Section 3: Team and people
You choose how to add your people:
- Import from a file: upload a CSV or Excel file and Terio maps the columns for you. See Importing People from a File.
- Add manually: build your team structure first (teams can sit inside other teams, for example an executive team at the top), then add people one at a time.
Adding someone manually needs their first name, last name, team, and an email address: a work email, or a personal one if they have no company email (the invitation goes to the work address first). Everything else is optional and can be added later, or the person is asked for it themselves when they first sign in.
You then review the structure: the hierarchy of teams, who reports to whom, and the people in each team. Anything can be adjusted before you go on.
Going live
At the end you choose Go Live, which invites everyone straight away, or Not Yet, which stores everyone without sending anything. If you choose Not Yet you can invite them later with one click. See Going Live and Inviting Your Team.
Policies (optional)
You are then offered the chance to upload your HR policies as PDFs (holiday, absence, disciplinary, grievance, harassment, flexible working and so on). Once uploaded, Terio uses them in every answer. You can skip this and upload from the Policies page at any time.
When setup is complete a confirmation screen tells you your workspace is ready, and the product tour shows you around.